Game Manual
Topics
More Topics
Notice! The manual is NOT FINISHED! The information seen here cannot yet be guaranteed, and you should ask the community for clarifications in the meantime.
Your Dogs
The most important thing on GoneMushing, next to you - of course, are your sled dogs! You can get to a list of dog that you own by going to your Kennel and clicking on the tab labeled "Dogs". If you click on a dog's name, it will take you to it's profile page. A dog profile contains a plethora of important information, including his identification number, name, age, gender, breed, personality, genetics; the list continues.| Icon | Meaning | Definition |
|---|---|---|
| Retired | This dog has reached the end of its racing career. it no longer needs care and cannot be raced or bred. | |
| Racing | This dog is currently competing in a race. Some functions are limited while it is racing. | |
| Inbred | This dog's ancestry includes related dogs. | |
| For Trade (Buy Now) | This dog is in a Buy Now trade that you can make an offer on. Follow a link to trade from their profile. | |
| For Trade (Auction) | This dog is in an auction type trade that you can make an offer on. Follow a link to trade from their profile. | |
| For Trade (Offer) | This dog is part of an offer on a trade, and you cannot make an offer to buy it. | |
| Expectant Mother | Dog has litter that is unborn. | |
| Nursing Mother | Dog has litter that is 0-1 days old. | |
| Mother | Dog has litter than is 2-6 days old. | |
| For Stud | This dog has been made available for public breeding request. |
| Age (in Days) | Milestone |
|---|---|
| 7 | Puppies grow into adult dogs |
| 10 | Eligible to race/Be on a team |
| 10 | Able to breed |
| 42 | Last day able to breed (inbred female) |
| 50+ | May retire (inbred) |
| 92 | Last day able to breed (female only) |
| 100 | Will retire permanently (inbred) |
| 100+ | May retire |
| 200 | Will retire permanently |
Acquiring Dogs
You will start off with one dog when you begin the game, but every other dog after that you will need to acquire on your own. There are four ways to get new dogs on GoneMushing: the New Dog page, the Rescue Center, the Trading Post, or by breeding your own puppies. Each breed of sled dog is unique - with different strengths and weaknesses - so you'll want to take a look at the Breed List to decide which dogs are best for you.Dog Shop
The easiest way to get a new dog by visiting the New Dog page. The dogs that you purchase from this shop will be ten (10) days old and purebred (with no dogs on their pedigree). They will also have a randomly generated set of statistics. Dogs with secure personalities cannot be purchased here.The shop is restocked every thirty minutes, and the types and amount of breeds that you will find will vary from time to time. Every breed listed on the Breed List is stocked according to it's type.
| Type | Chance of Stock |
|---|---|
| Common | 100% Stock 10 Dogs |
| Uncommon | 0.3% Stock 5 Dogs |
| Rare | 0.2% Stock 2 Dogs |
| Player Created | 0.2% Stock 2 Dogs |
Rescue Center
You can also adopt a dog from the Rescue Center. Here, you can choose from already existing dogs that other players have abandoned. Unlike creating a dog on the New Dog page, here you will know exactly what you're getting before you buy. Though, keep in mind that dogs from the Rescue Center are always spayed or neutered.Trading Post
Another way to find dogs is to search for those for sale at the Trading Post. These dogs are sold by other players. The types of dogs that you will find here, and the amount of gold that they will cost may vary greatly. At the trading post, you can find multiple dogs for sale together and entire teams. Remember to keep an eye on the Advertising Board if you're interested in buying, selling, or trading dogs with other players - people love to advertise their sales!Breeding Dogs
Finally, you can breed your own puppies by breeding one male and one female adult dog together. The result will be a litter with puppies who have statistics and genetics that were inherited from their parents. Click here to read more about Breeding.Dog Statistics
There are numerous variables that go into what constitutes a "good sled dog" on GoneMushing. Every dog can contribute to a well built team, because certain positions require different abilities.You can view a dog's statistics by going to their profile page and looking to the right-hand side of the screen. There you will see four tabs labeled Overview, Statistics, Health, and History. Navigating through these tabs will show you various statistics - all of the variables that make up your individual dog.
Hunger, Thirst, and Mood
These three status bars are located under the tab labeled "Overview," and they indicate how hungery, thirsty, or happy your dog is. Feeding, watering, and playing with your dogs will increase these statistics. Dogs do not need to eat, drink, or play to survive on GoneMushing, and a failure to perform these activities will have no adverse consequences in the game. Click here to read more about hunger, mood, and thirst.Energy
You dog's energy is an important factor to keep an eye on, and it is also located under the "Overview" tab. Every dog has an energy percentage between 0% and 100%, and this affects their ability to race, train, and play. The more energy your dogs have, the faster they will run a race. You will also have more ways to interact with your dog when they have energy. Different interactions you perform with your dog will increase or reduce their energy.| + Gaining Energy | |
|---|---|
| Energy Gained | Activity |
| +5% | Not Active Past 30 Min; Dog Not Racing |
| +10% | Active Past 30 Min (Normal Account); Dog Not Racing |
| +15% | Active Past 30 Min (Upgraded Account); Dog Not Racing |
| +25% p/Serving | Feed Green Gazelle |
| +40% p/Serving | Feed Caesar |
| +100% | Some Special Items* |
| * Unlike other activities, special items may increase dogs' energy past 100%. All other methods will not allow a dog to exceed 100% energy. | |
| - Losing Energy | |
|---|---|
| Energy Lost | Activity |
| -10% | Play With Dog |
| -10% | Train Dog |
| -25% | Use Behaviorist |
| Varied (Scaled) | Racing |
Train Ability
Located under the tab labeled "Statistics" is Train Ability (TA). This is a number that represents how easy it is to train your dog; that is, how quickly it learns. This is a number that ranges from 1 to 20, and will never go any higher than that. A dog with a Train Ability of 1 is going to take a long time and lot of training to improve, while a dog with 20 will start to improve immediately and much more drastically. Store dogs will start with between 1 and 10 points, but if you use a user's Training Area rather than the default one, you have a chance to raise this stat while you train your dogs.Traditional Statistics
Each dog on the game has five basic measures which represent the several different abilities that make up a good sled dog. These are Intelligence, Speed, Stamina, Strength, and Obedience. They, too, are located under the "Statisics" tabs. These statistics, and some others, will help you determine which team position is best for each individual dog.
Intelligence (Int) represents how well your dog is able to remember trails, and make problem solving decisions during runs.
Speed (Spd) is how fast your dog can run.
Stamina (Stm) shows how long your dog can mintain a steady pace.
Strength (Str) indicates how robust and sturdy your dog is.
Obedience (Obd) is your dog's ability to recognize and obey commands.
Speed (Spd) is how fast your dog can run.
Stamina (Stm) shows how long your dog can mintain a steady pace.
Strength (Str) indicates how robust and sturdy your dog is.
Obedience (Obd) is your dog's ability to recognize and obey commands.
Major, Minor & Low Statistics
Each of these traditional statistics - Intelligence, Speed, Stamina, Strength, and Obedience - may independently improve to a total score that is determined by the dog's Major, Minor, and Low statistics. Major, Minor, and Low statistics represent the individual dog's strengths and weaknesses. The table below outlines when each statistic will be trained to it's fullest potential based on the dog's Major, Minor and Low statistics.
Note: Major, Minor, and Low labels only apply to Intelligence, Speed, Stamina, Strength and Obedience.
| Stat Max | Stat Label |
|---|---|
| 25 | Major |
| 20 | Minor |
| 15 | N/A |
| 10 | Low |
Health Status
Located under the tab labeled "Health," you will find his Health Status. A status of Healthy indicates that your dog is not suffering any injuries. Unhealthy conditions include: Eye Infection; Ear Infection; Inflamed Joints; Shoulder Strain; and Foot Fracture. Dogs suffering from these unhealthy conditions will not be able to participate in certain activites, including racing, training, and breeding.Immunity Points
Under the "Health" tab on a dog's page you will also find his immunity points. This number represents the dog's how strong his immune system is and how prone he is to injuries. This number is infinite; it will not stop increasing. You can increase this statistics with certain food and water (and special items). Immunity Points cannot be reduces, except by racing. If a dog is injured in a race, his Immunity Points will be reduced by one (1) point.Health Statistics
Also seen under the "Health" tab are five more very important variables - your dog's health statistics. Each of these values corresponds to one of the five traditional statistics. In a race, these statistics will be used to determine whether your dog is physically capable of working to it's fullest potential. Click here to learn how health statistics are used in racing.These statistics have a maximum value of 10 in each area, and can only be increased through feeding (and special items). Health statistics cannot be reduces, except by racing. If a dog is injured in a race, a certain health statistic will be reduced by three (3) points.
Personality
Personality is actually a very important statistic on GoneMushing, and is it located outside of the tabs - on the left-hand side of the page. There are ten different Personalities, and each corresponds to one of four Temperaments. As well as helping you figure out which kind of toy your dog will like, his personality will also make him more or less ideal for certain positions on a team.| Temperament | Personality |
|---|---|
| Secure | Confident |
| Secure | Dependable |
| Assured | Reactive |
| Assured | Excitable |
| Assured | Calm |
| Unsure | Curious |
| Unsure | Mischievous |
| Unsure | Odd |
| Insecure | Timid |
| Insecure | Cautious |
Original Statistics
ExplainLooking back to the right-hand side of a dog's profile, click on the tab labeled "History." Here you will see the dog's lineage, original statistics, and racing history. Your dog's lineage is his pedigree (ancestory) and his kin (puppies). Original statistics are those that he was born with. Finally, racing history is his complete racing record, split into categories labeled weekly, monthly, and all-time respectively. Some of the information provided under this tab is just for fun, while other material will apply to Breeding. Click here to read more about Breeding.
Genetics
Blurb.Dog Care
All of these things are optional, but certain activites will improve your racing performance.Equipping Items
Below the hunger, thirst, mood, and energy status bars, you will see six empty item slots, labeled "Food Bowl," "Water Bowl," "Toy," "Collar," "Harness," and "Booties" respectively. Before you may begin caring for your dogs, you must first equip them with both a food and water bowl. You can buy bowls and other items from K9-Mart, or by searching Items For Sale. In empty slots, you will see dropdown menus containing certain items from your Inventory. Select the items that you want to use in each of those spots, and click "Add Items" on the dog's page.You must also assign your dog a food, water, and toy before you can begin feeding, watering, or playing with them. In a moment we will discuss why these activies are important, and how to choose the items to use. Though, it will be useful to know how to assign these items. You can do this on a dog's profile. Look at the left-hand side of the screen, and scroll down. You will see slots labeled "Food", "Water", and "Toy" along with dropdown menus containing certain items from your Inventory. Choose the appropriate items, and click "Submit Changes" to save. After you have assigned these items, you will be able to feed, water, and play with your dog from his profile page.
Feeding & Watering
A dog can eat and drink three (3) servings of both food and water each day. Each serving will earn you five (5) experience points. That's a total of 30 experience points per day just for feeding and watering your dog.There are three brands of food: Caesar (dry kibble), Green Gazelle (dry kibble), and Raw Meats. There five flavors of each brand available, and each has a chance to increase a certain health statistic. Dry foods also increase a dog's energy, while raw meats have a chance of increasing a dog's Immunity Points.
| Level | Food Item | Uses |
|---|---|---|
| 1 |  Caesar Beef Flavor Caesar Beef Flavor |
• Satisfy Hunger • Increase (+) Energy 40% • 20% Chance Increase (+) Muscle +1 |
| 1 |  Caesar Chicken Flavor Caesar Chicken Flavor |
• Satisfy Hunger • Increase (+) Energy 40% • 20% Chance Increase (+) Ears +1 |
| 30 |  Caesar MAX Beef Flavor Caesar MAX Beef Flavor |
• Satisfy Hunger • Increase (+) Energy 75% • 50% Chance Increase (+) Muscle +1 |
| 30 |  Caesar MAX Chicken Flavor Caesar MAX Chicken Flavor |
• Satisfy Hunger • Increase (+) Energy 75% • 50% Chance Increase (+) Ears +1 |
| 30 |  Caesar MAX Pork Flavor Caesar MAX Pork Flavor |
• Satisfy Hunger • Increase (+) Energy 75% • 50% Chance Increase (+) Paws +1 |
| 30 |  Caesar MAX Veggie Flavor Caesar MAX Veggie Flavor |
• Satisfy Hunger • Increase (+) Energy 75% • 50% Chance Increase (+) Eyes +1 |
| 30 |  Caesar MAX Whitefish Flavor Caesar MAX Whitefish Flavor |
• Satisfy Hunger • Increase (+) Energy 75% • 50% Chance Increase (+) Joints +1 |
| 1 |  Caesar Ocean Whitefish Flavor Caesar Ocean Whitefish Flavor |
• Satisfy Hunger • Increase (+) Energy 40% • 20% Chance Increase (+) Joints +1 |
| 1 |  Caesar Pork Flavor Caesar Pork Flavor |
• Satisfy Hunger • Increase (+) Energy 40% • 20% Chance Increase (+) Paws +1 |
| 1 |  Caesar Veggie Flavor Caesar Veggie Flavor |
• Satisfy Hunger • Increase (+) Energy 40% • 20% Chance Increase (+) Eyes +1 |
| 10 |  Green Gazelle Beef & Barley Formula Green Gazelle Beef & Barley Formula |
• Satisfy Hunger • Increase (+) Energy 25% • 50% Chance Increase (+) Muscle +1 |
| 10 |  Green Gazelle Garden Mix Formula Green Gazelle Garden Mix Formula |
• Satisfy Hunger • Increase (+) Energy 25% • 50% Chance Increase (+) Eyes +1 |
| 10 |  Green Gazelle Lamb & Barley Formula Green Gazelle Lamb & Barley Formula |
• Satisfy Hunger • Increase (+) Energy 25% • 50% Chance Increase (+) Paws +1 |
| 10 |  Green Gazelle Smoked Salmon Formula Green Gazelle Smoked Salmon Formula |
• Satisfy Hunger • Increase (+) Energy 25% • 50% Chance Increase (+) Joints +1 |
| 10 |  Green Gazelle Turkey & Egg Formula Green Gazelle Turkey & Egg Formula |
• Increase (+) Energy 25% • 50% Chance Increase (+) Ears +1• Satisfy Hunger |
| 30 |  Green Gazelle Wild Taste Bison Formula Green Gazelle Wild Taste Bison Formula |
• Satisfy Hunger • Increase (+) Energy 25% • 50% Chance (+) Immunity Point +2 • 50% Chance Increase (+) Muscle +1 |
| 30 |  Green Gazelle Wild Taste Elk Formula Green Gazelle Wild Taste Elk Formula |
• Satisfy Hunger • Increase (+) Energy 25% • 50% Chance (+) Immunity Point +2 • 50% Chance Increase (+) Paws +1 |
| 30 |  Green Gazelle Wild Taste Ocean Fish Formula Green Gazelle Wild Taste Ocean Fish Formula |
• Satisfy Hunger • Increase (+) Energy 25% • 50% Chance (+) Immunity Point +2 • 50% Chance Increase (+) Joints +1 |
| 30 |  Green Gazelle Wild Taste Quail Formula Green Gazelle Wild Taste Quail Formula |
• Satisfy Hunger • Increase (+) Energy 25% • 50% Chance (+) Immunity Point +2 • 50% Chance Increase (+) Ears +1 |
| 30 |  Green Gazelle Wild Taste Sweet Potato Formula Green Gazelle Wild Taste Sweet Potato Formula |
• Satisfy Hunger • Increase (+) Energy 25% • 50% Chance (+) Immunity Point +2 • 50% Chance Increase (+) Eyes +1 |
| 20 |  Raw Beef Raw Beef |
• Satisfy Hunger • 50% Chance Increase (+) Immunity Point +1/+2 • 50% Chance Increase (+) Muscle +1 |
| 20 |  Raw Gizzards Raw Gizzards |
• Satisfy Hunger • 50% Chance Increase (+) Immunity Point +1/+2 • 50% Chance Increase (+) Ears +1 |
| 20 |  Raw Rabbit Raw Rabbit |
• Satisfy Hunger • 50% Chance Increase (+) Immunity Point +1/+2 • 50% Chance Increase (+) Paws +1 |
| 20 |  Raw Rainbow Trout Raw Rainbow Trout |
• Satisfy Hunger • 50% Chance Increase (+) Immunity Point +1/+2 • 50% Chance Increase (+) Joints +1 |
| 20 | 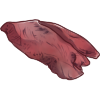 Raw Venison Raw Venison |
• Satisfy Hunger • 50% Chance Increase (+) Immunity Point +1/+2 • 50% Chance Increase (+) Eyes +1 |
| Level | Water Item | Uses |
|---|---|---|
| 1 | N/A | |
| 2 |  Gallon of Spring Water Gallon of Spring Water |
• Satisfy Thirst • 10% Chance Increase (+) Immunity Point +1 |
| 8 | 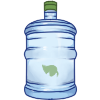 Gallon of Artesian Water Gallon of Artesian Water |
• Satisfy Thirst • 20% Chance Increase (+) Immunity Point +1 |
Playing
You can play with your dog as long as it is at least 10% energized*. Each session will earn you four (4) experience points, but cost your dog 10% energy. Keep in mind that you can't use any toy to play with your dog. Certain personalities prefer different toys, and you will need to figure out which one best suits your dog's personality.* Mushers who have reached level 30 may only play with each dog up to three (3) times a day.
| Personality | Preferred Toys |
|---|---|
| Cautious | 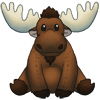 Plush Moose Plush Moose Plush Orca Plush Orca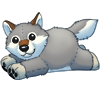 Plush Wolf Plush Wolf Plush Duckie Plush Duckie Plush Bear Plush Bear |
| Timid |  Tennis Ball Tennis Ball Rubber Ball Rubber Ball Plastic Ball Plastic Ball Miniature Football Miniature Football Miniature Soccer Ball Miniature Soccer Ball |
| Odd |  Rubber Chicken Rubber Chicken Giant Sugar Pine Cone Giant Sugar Pine Cone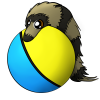 Motorized Ball Motorized Ball PVC Pipe PVC Pipe Plastic Bottle Plastic Bottle |
| Mischievous |  Underpants Underpants Bunny Slipper Bunny Slipper Pillow Pillow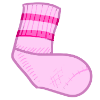 Tube Sock Tube Sock Beach Towel Beach Towel |
| Curious | 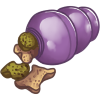 Purple Treat Hide-Away Purple Treat Hide-Away Green Treat Hide-Away Green Treat Hide-Away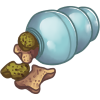 Blue Treat Hide-Away Blue Treat Hide-Away Pink Treat Hide-Away Pink Treat Hide-Away Yellow Treat Hide-Away Yellow Treat Hide-Away |
| Calm |  Rawhide Bone Rawhide Bone Rawhide Roll Rawhide Roll Rawhide Baseball Rawhide Baseball Elk Antler Elk Antler Pig Ear Pig Ear |
| Excitable |  Purple Tug Toy Purple Tug Toy Brown Tug Toy Brown Tug Toy Orange Tug Toy Orange Tug Toy Green Tug Toy Green Tug Toy Blue Tug Toy Blue Tug Toy |
| Reactive |  Blue Tug Rope Blue Tug Rope Yellow Tug Rope Yellow Tug Rope Red Tug Rope Red Tug Rope Green Tug Rope Green Tug Rope Orange Tug Rope Orange Tug Rope |
| Dependable |  Squeaky Steak Squeaky Steak Squeaky Squirrel Squeaky Squirrel Squeaky Whale Squeaky Whale Squeaky Carrot Squeaky Carrot Squeaky T-Rex Squeaky T-Rex |
| Confident |  Vermilion Frisbee Vermilion Frisbee Lime Green Frisbee Lime Green Frisbee Black Frisbee Black Frisbee White Frisbee White Frisbee Rainbow Frisbee Rainbow Frisbee |
Training Statistics
Training your dogs is how you raise your dog's traditional statistics to their fullest potential. You can train your dog at the public Training Area, or by searching Jobs Opened. Training your dogs at the public Training Area is free, but you must have purchased your own training items. If you employ another player's Training Area, then you use will their equipment - even if you're not yet at a musher level to unlock it yourself.| Level | Training Item | Uses |
|---|
Every training session has the potential to raise a dog's Training Points in the statistic area that you choose. Each of the five traditional statistics has its own set of Training Points. Once a certain area of Training Points have increased to a score of 10 (ten), the traditional statistic will gain +1 point and the respective Training Points will be reset.
The chance of success at training depends on your dog's Train Ability. This is a number that represents how easy it is to train your dog; that is, how quickly it learns. This is a number that ranges from 1 to 20, and will never go any higher than that. A dog with a Train Ability of 1 is going to take a long time and lot of training to improve, while a dog with 20 will start to improve immediately and much more drastically.
Every time you train a dog - regardless of which kind of Training Area you use or the outcome of the session - it will consume 10% energy from each dog. The benefit of using another player's Training Areaover the free alternative is that player jobs, and only player jobs, have the chance to improve your dog's Train Ability.
Health Care
Your dogs need to be healthy to race, train, or breed. Racing also requires your dogs to be up-to-date on their vaccinations and physical examinations. For this reason, it's important to be diligent with their vet care! You can take your dogs to the public Veterinarian or find a player's job by by searching Jobs Opened. There is no difference in the services provided, but a player's vet may be less expensive.
Physical Exam: The vet will give your dog a physical exam to check its health and soundness for racing. This must be performed once a week. If your dog is injured in a race, bring him to the vet for a physical exam to cure him so that he can race again.
Renew Vaccines: The vet will update your dog's vaccinations. This must be done once a month.
Spay/Neuter: Spayed or neutered dogs will no longer be able to breed, but they also can be paired with other dogs of the opposite gender on a team without any problems, unlike intact dogs, so this is a very useful option for some dogs.
Retire: Normally dogs retire at the age of 100-105 days (possibly slightly longer if they are in a long race at 105), and inbred dogs normally retire at the age of 50-55 days, but you can retire your dog early at the vet if you wish. Retired dogs can be viewed in the special retired section of your kennel's "Dogs" tab, but they no longer take up room in your kennel, they can no longer be raced or bred, and they no longer require care.
Cull Litter: If you accidentally bred the wrong dogs or are not happy with the outcome of a breeding, you can take the mother to the vet to cull the litter. She will be able to be bred again immediately.
Improving Personality
The Behaviorist is here to help you work with your adult dogs to improve their personalities. You can find one at the public Behaviorist Office, or by searching Jobs Opened. If you employ another player's job, then you will have a 50% chance of success (verses only 20% at the public Behaviorist Office).A dog may be successfully improved by a Behavorist two (2) times during his lifetime. Each session will consume 25% of a dog's energy. After you have used the Behaviorist - regardless of which kind of Office you use or the outcome of the session - the dog will need to wait a minimum of twelve (12) hours before it can see a Behaviorist again.
Note: If you're not sure whether a dog's personality has already been improved twice - check under the History tab, and compare his original personality to his current one.
Logout
•
Terms of Service
•
Get Support
•
Credits
•
Disclaimer
Version 0.4.2 released 11/19/2021 Loaded in 0.00919 seconds
© 2012–2026 GoneMushing.com. All rights reserved.
Version 0.4.2 released 11/19/2021 Loaded in 0.00919 seconds
© 2012–2026 GoneMushing.com. All rights reserved.

 Saturday, May 16th, 2026 | 1:02am EST